Travel Photography on a Smartphone, Fancy Camera Optional
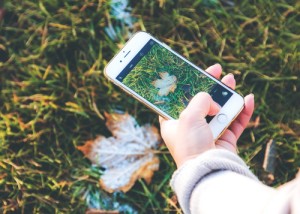
Smartphone cameras have come a long way in quality! While obviously not as professional as a DSLR camera, anyone with a bit of a creative streak can have fun experimenting with different photography techniques when traveling. It’s the perfect opportunity to play around and come back with a bunch of great photos with stories to tell!
But there are some tips and tricks you can use to up your travel photography game:
- Don’t even think about using flash or zoom.
It’s tempting when something is far away or it is dark; however, your phone’s flash and zoom features are bad news for high-quality photos. Your phone zooms digitally, not optically, so it will quickly become pixelated and grainy. Instead, move as close to the subject as possible, and if that’s still not enough, crop the photo when you go to edit. Forget using the flash feature, as well. The flash is difficult to control, creating shocking lighting, harsh shadows, and blurriness. Which leads us to the next point…
- Go toward the light.
Lighting is perhaps the most tricky part of mastering smartphone photography, especially at night. The best light of the day is usually an hour after sunrise and an hour before sunset – you’ll get rich hues of light without harsh angles and dark shadows. For nighttime photography, lighting is even more important. If you shoot in the dark, you’ll get a grainy, blurry mess. Look for light sources; in a pinch, you may even try using the flashlight app and bouncing the light off of something else to soften the harshness of the light.
- Hold your phone still and like a typical camera.
Don’t just snap a bunch of photos and hope you get a good shot. Take a moment to view the surroundings and look for that epic shot. Then, hold the phone with two hands, like you would a regular camera, and use the auxiliary buttons (the volume button on an iphone); tapping the screen to shoot will create shakiness.
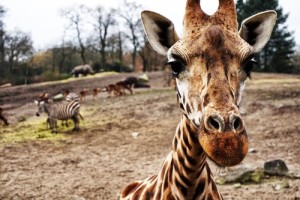
- Create layers and depth.

Chateau de Belleroy, Normandy
Your phone lacks the right lensing to accurately portray the immensity of a chateau, mountain or an otherwise epic backdrop. As an alternative, create dimension in your photos by finding different layers. For example, if a road leads off into the distance toward the chateau focus on the road as your subject, leading your eyes toward the mountain in the background. Similarly, rocks, boulders, and trees, and even slow-moving/stationary animals can create interesting layers and frames!
- Black and white goes a long way.
Okay, this is a bit of a cheat, but it’s a good trick to have up your sleeve. Our phones have difficulty reproducing rich and vivid cameras like a DSLR does, and dark lighting can create blurry or grainy photos. As an alternative, play around with black and white, which is more forgiving. You can get some dreamy Ansel Adams-like images with just a bit of experimenting!
- Shoot horizontally.
As a general rule, in travel photography you want to shoot horizontally. Not only will this give you more room for framing, but it will also render better if you’re taking video.
- Adjust the focus.
Try holding your finger on the screen to lock focus on your subject; experiment by focusing on something close up and then backing away to create a blurry bokeh effect. If you want a simpler, more accurate, way to achieve that professional bokeh-look, you can invest in a simple lens attachment (but don’t use the “blur” filter on an editing app; it blurs the background evenly and doesn’t achieve the same effect).
- Get into the grid.
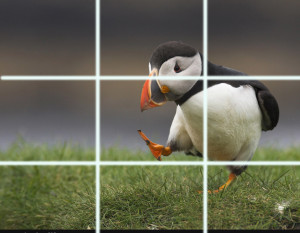
c.Bob Krueger
The Rule of Thirds is one of the fundamentals of photography (of course, rules are meant to be broken now and then). The idea is that there is a grid of two horizontal and two vertical lines, creating a grid of nine rectangular boxes. Have vertical subjects line up with either vertical line, or place the focus at the intersection of two lines. Turn this feature on in Settings and try snapping photos in different compositions to see what looks best (you can also crop when you go to edit, but it’s best to try to get it shot right in the first place).
- Use an editing app.
Using an editing app is not cheating – even professional photographers edit their photos (of course, they’re artists using professional software like Photoshop). Most photos can benefit from a few touch-ups, whether increasing lighting, saturating colors a bit, or contrast.
But use a light hand; over-editing can make photos look cheap or fake. Try out a few different apps to see which one you like best. You might start by trying out Camera+, VSCO Cam, and Afterlight. When you go to post your travel photography on Instagram, be judicious by sharing only your favorite photos (quality vs. quantity!). A tightly curated collection of photos will showcase your trip to best effect and not clog your friends’ feeds with the 17th photo of a jaw-dropping sunset.
- Bring some extra juice.
Your smartphone, or any electronic device, is pretty useless without energy. Be sure to fully charge your devices before bed and bring along a portable energy source, especially if you’ll be away from an outlet for a long period of time.
Now get out there and bring home some masterpieces!
(Thanks to Jacob Marek of Introvertravels for this article).